Customizing your desktop is one of the easiest ways to make your computer look modern, stylish, and more enjoyable to use every day. Instead of using the default Windows layout, you can add animated wallpapers, widgets, and a dock to give your desktop a clean and premium appearance. In this guide, you will learn how to recreate an awesome desktop setup using a few simple tools. The process is beginner-friendly, so even if you have never customized your desktop before, you can follow the steps without any difficulty.
Tools Required for the Desktop Setup
Before starting, you need to download a few applications and files that will help you customize the desktop. These tools allow you to add live wallpapers, stylish icons, and useful widgets.
Required downloads:
Each tool plays a different role in the customization process. Once everything is downloaded and installed, you can begin setting up the desktop.
Step 1: Set Up the Live Wallpaper
The first step is to change the normal static wallpaper into a dynamic live wallpaper. For this, install Lively Wallpaper on your computer. After installing it, open the application and import the Leaf Wallpaper file.
Once the wallpaper is applied, your desktop background will become animated. Live wallpapers add motion and depth to your screen, making the desktop look more modern compared to a standard background image.
You can also adjust playback settings inside Lively Wallpaper, such as performance mode and screen behavior, to ensure that the animation runs smoothly without affecting system performance.
Step 2: Install and Configure Rainmeter
The next step is installing Rainmeter, which is a popular desktop customization tool used to add widgets and system information on the desktop.
After installing Rainmeter:
- Extract the Theme Zip File you downloaded earlier.
- Import the Rainmeter skin included in the theme.
- Load the widgets on your desktop.
These widgets may include items such as:
- Clock
- Date display
- System information
- Minimal design elements
Rainmeter skins help give your desktop a professional and organized appearance. You can also move the widgets anywhere on the screen to match the layout shown in the tutorial.
Step 3: Add the Dock Using Winstep Nexus
To make the desktop look even better, install Winstep Nexus Dock. This tool creates a macOS-style dock on your desktop where you can place frequently used apps.
After installing Nexus Dock:
- Launch the application.
- Add your favorite programs like browser, file explorer, and media apps.
- Position the dock at the bottom or side of the screen.
The dock not only improves the visual design of the desktop but also makes it easier to launch applications quickly.
You can customize the dock’s icons, animation effects, and transparency to match the theme of your desktop setup.
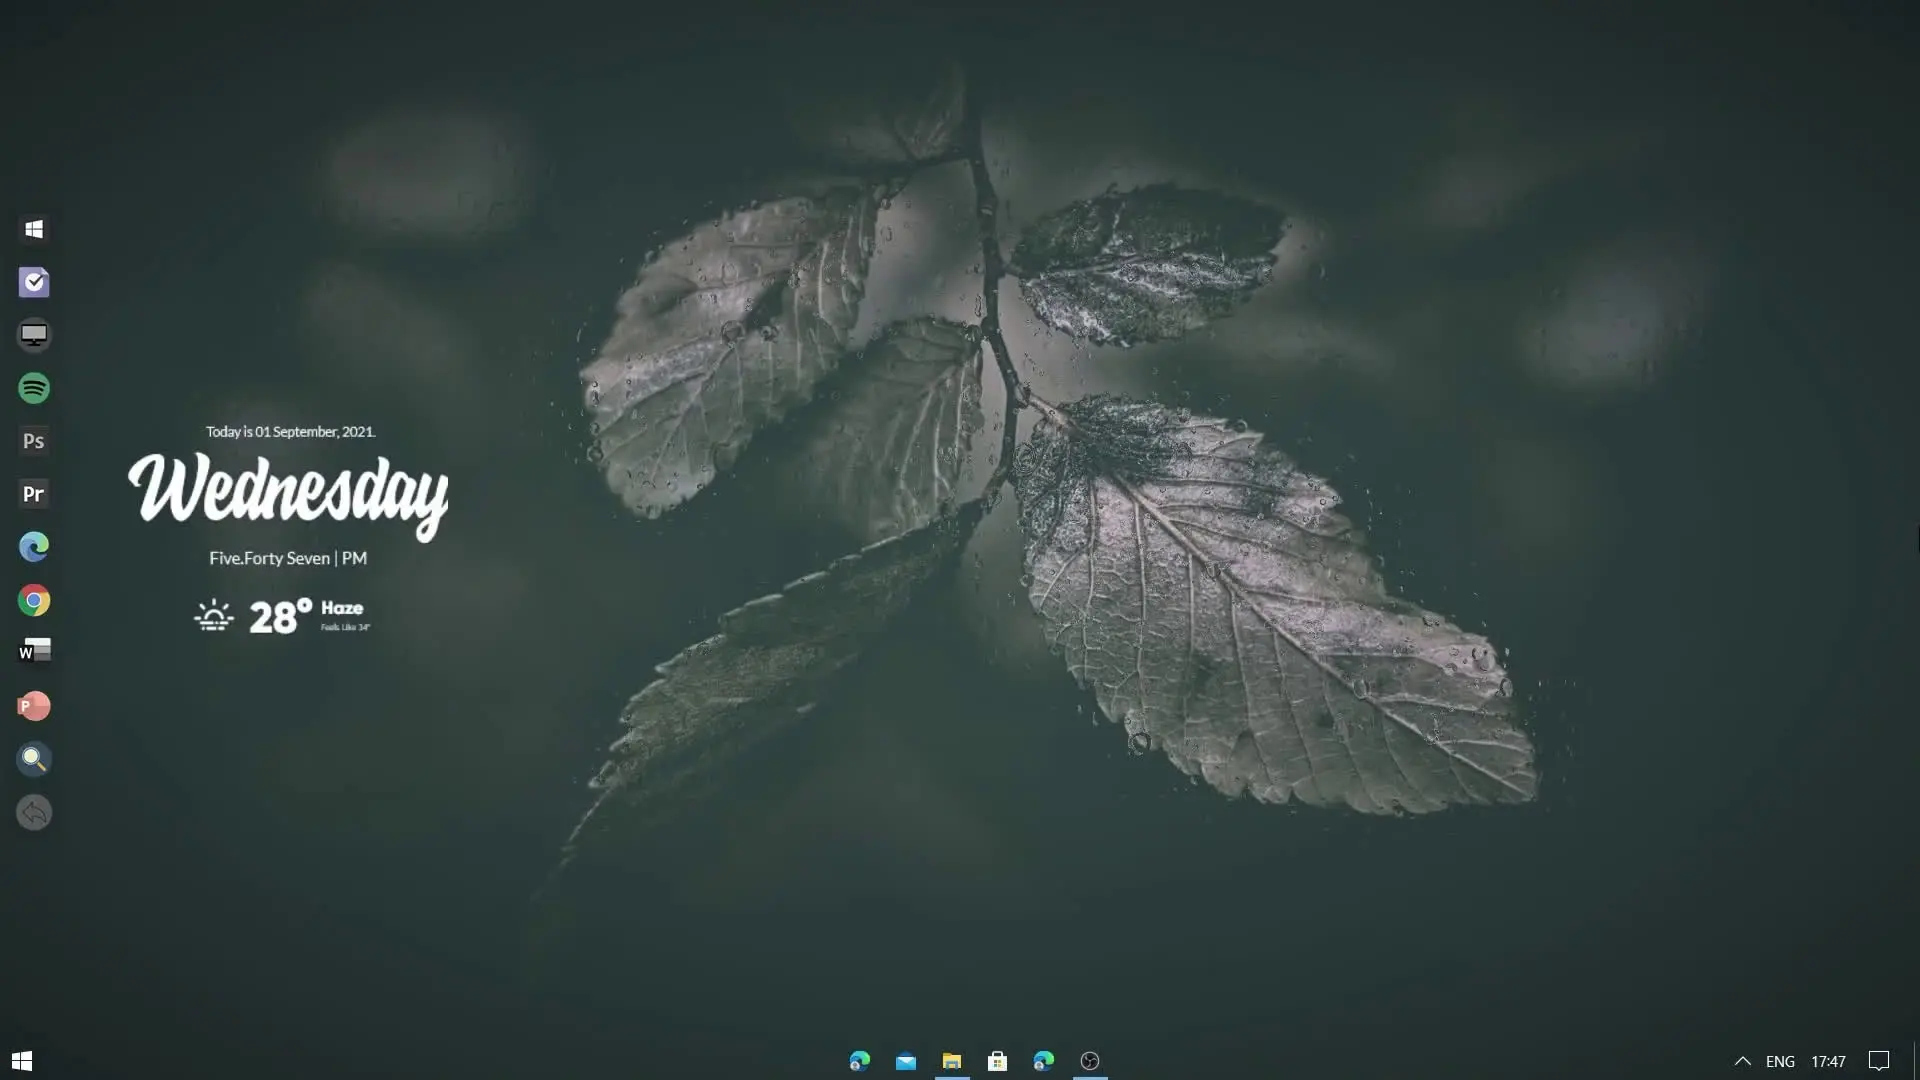
Final Result
After completing these steps, your desktop will look clean, modern, and visually impressive. The combination of live wallpapers, Rainmeter widgets, and a stylish dock creates a desktop environment that feels much more advanced than the default Windows interface.
This setup is also flexible, meaning you can adjust widget placement, change wallpapers, or add new icons based on your personal preferences. Once everything is configured correctly, your desktop will look almost identical to the one shown in the tutorial.