Many people like the modern design of Windows 11, but not everyone wants to upgrade their computer yet. Some PCs do not meet the official requirements, while others simply run better on Windows 10. The good news is that you can still enjoy a Windows 11-style interface without installing the new operating system. By using a few customization tools and themes, you can easily change the appearance of Windows 10 so it looks very similar to Windows 11.
In this guide, you will learn a simple method to transform your Windows 10 desktop with a Windows 11 style taskbar, icons, and start menu. The process is safe if you follow the steps carefully and use trusted tools.
Why People Want Windows 11 Style on Windows 10
Windows 11 introduced a fresh and modern design compared to Windows 10. It includes a centered taskbar, updated icons, softer window corners, and a redesigned start menu. These changes make the desktop look cleaner and more modern.
However, many users still prefer to stay on Windows 10 because:
- Their computer does not meet Windows 11 system requirements
- They want to avoid upgrading their operating system
- They like Windows 10 performance but prefer the Windows 11 design
Customizing Windows 10 allows users to enjoy the visual style of Windows 11 without changing the actual system.
Tools Required for the Customization
To make Windows 10 look like Windows 11, several customization tools are commonly used. Each tool changes a different part of the interface.
Some commonly used tools include:
✅ DOWNLOAD ✅
- Secure UX Theme
- Windows 11 for Windows 10
- Stardock Curtains
- Windows 11 Icon Theme
- 7TSP GUI
- TaskbarX
- Windows 11 Start Menu
- Classic Shell
These tools work together to recreate the look of Windows 11.
Step 1: Enable Custom Themes
The first step is enabling custom themes on your Windows 10 system. By default, Windows only allows official Microsoft themes. Tools like Secure UX Theme remove this limitation so you can install third-party themes.
After installing the theme patcher, restart your computer to make sure the changes are applied correctly.
Step 2: Install the Windows 11 Theme
Next, download and apply a Windows 11 style theme designed for Windows 10. This theme changes several visual elements such as window borders, colors, and overall UI appearance.
Once installed, open the Windows personalization settings and select the newly installed theme. You should immediately notice the interface looking more similar to Windows 11.
Step 3: Apply Windows 11 Icons
Windows 11 uses updated system icons that look cleaner and more modern. You can install an icon pack using tools like 7TSP GUI to replace the default Windows 10 icons.
This will update icons across the system, including folders, drives, and system shortcuts.
Step 4: Center the Taskbar Icons
One of the most noticeable design changes in Windows 11 is the centered taskbar icons. TaskbarX is a popular tool that allows you to center your taskbar icons automatically.
After installing it, the icons will move toward the center of the taskbar, giving your desktop the familiar Windows 11 layout.
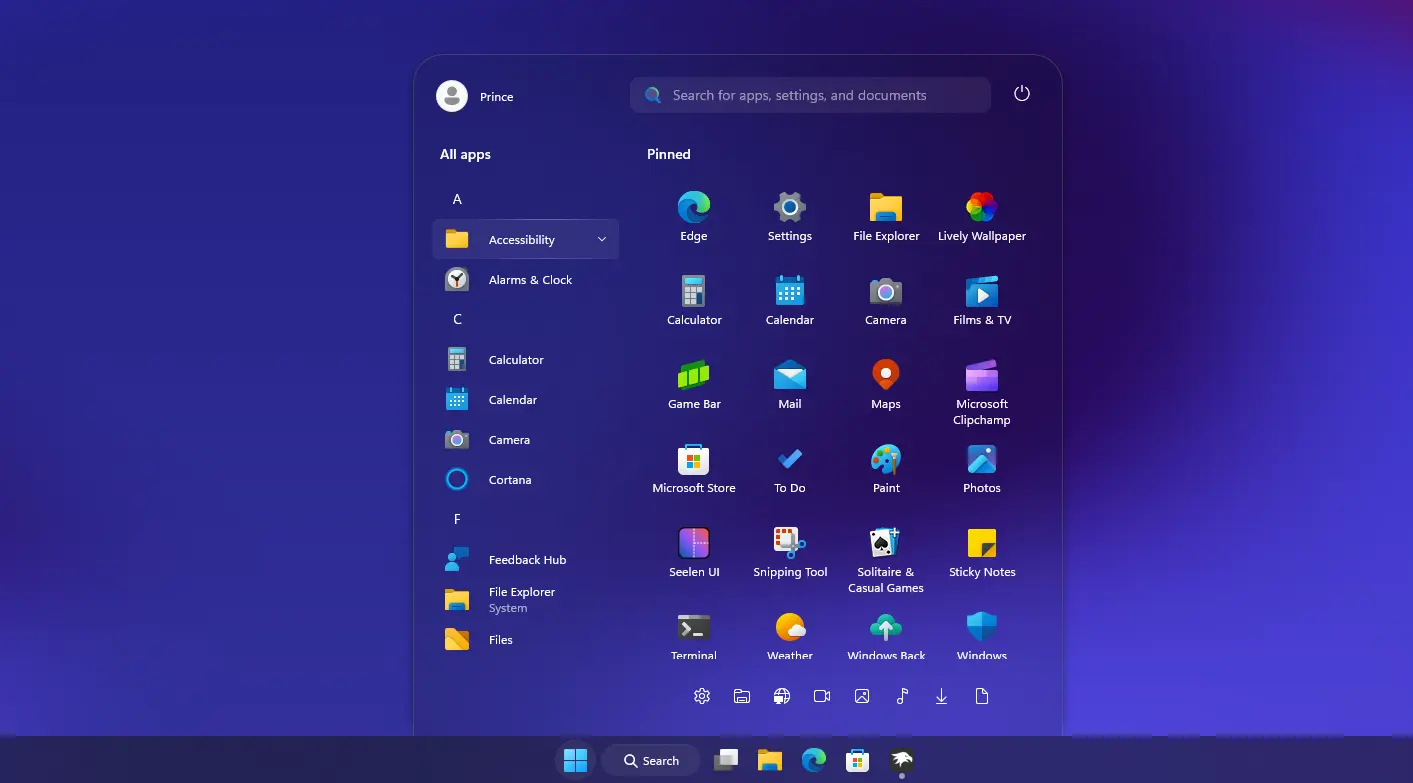
Step 5: Install a Windows 11 Style Start Menu
To complete the transformation, you can install a start menu replacement. Tools like Classic Shell or Windows 11 style start menu packages recreate the new menu layout.
Once applied, the start menu will look much closer to what you see in Windows 11.
Final Thoughts
Transforming Windows 10 to look like Windows 11 is easier than many people expect. With the help of a few customization tools, you can update the taskbar, icons, themes, and start menu to achieve a modern interface similar to Microsoft’s latest operating system.
Just make sure you download the tools from trusted sources and follow each step carefully. With the right setup, your Windows 10 PC can enjoy the visual style of Windows 11 while still keeping the stability and performance of your current system.