Many people like to customize their desktop so it looks clean, organized, and visually appealing. A minimal desktop layout with widgets and a simple wallpaper can make your computer look modern while also giving quick access to useful information like time, system stats, and shortcuts. In this guide, you will learn how to create a similar desktop setup using Rainmeter and a few configuration files.
This setup focuses on simplicity. Instead of a cluttered screen filled with icons, it uses a clean wallpaper and lightweight widgets placed neatly on the desktop.
What You Need Before Starting
Before setting up the desktop theme, make sure you have the following files ready:
- Wallpaper used in the setup
- Rainmeter software
- Theme configuration files (widgets / skins)
✅ DOWNLOAD ✅
These files usually come in a compressed folder. After downloading them, you will need to extract the files so they can be installed properly.
Step 1: Prepare Your Desktop
The first step is preparing your desktop so the theme looks clean and distraction-free.
Start by hiding the desktop icons. On Windows, you can do this by right-clicking on the desktop, selecting View, and then unchecking Show Desktop Icons.
Next, you should also hide the taskbar icons or minimize them if possible. Some people also enable auto-hide for the taskbar so that it only appears when the mouse cursor moves to the bottom of the screen.
These small changes help create a minimal look where the widgets and wallpaper become the main focus.
Step 2: Install Rainmeter
Rainmeter is a popular desktop customization tool for Windows. It allows you to add widgets, also called skins, that can display information like time, CPU usage, music player controls, weather, and more.
Download and install Rainmeter from its official website. After installation, the program will automatically load some default skins on your desktop.
Since this theme uses its own custom widgets, you should unload the default skins that Rainmeter installs.
To remove them:
- Right-click any Rainmeter widget on the desktop
- Select Unload Skin
Repeat this until the default widgets disappear from the screen.
Step 3: Extract the Theme Files
After downloading the theme files provided in the setup, you will need to extract them.
Most downloads come in a ZIP file, so you can right-click the file and select Extract Here or Extract All.
Inside the extracted folder, you will find several subfolders that contain the Rainmeter skins and configuration files needed for the desktop layout.
Step 4: Copy the Files to the Rainmeter Skins Folder
Now you need to move the theme folders to the Rainmeter skins directory.
Follow this path on your computer:
Documents → Rainmeter → Skins
Open the Skins folder and copy all the theme folders from the extracted download into this location.
Once the folders are pasted there, Rainmeter will be able to detect the new skins.
Step 5: Load the Widgets
After placing the files in the correct folder, open the Rainmeter Manager.
You will see the new skins listed in the left panel. From here you can load each widget one by one.
Select a skin and click Load to place it on your desktop. Repeat this process until all widgets from the theme are active.
You can also drag the widgets around the screen to match the layout shown in the setup.
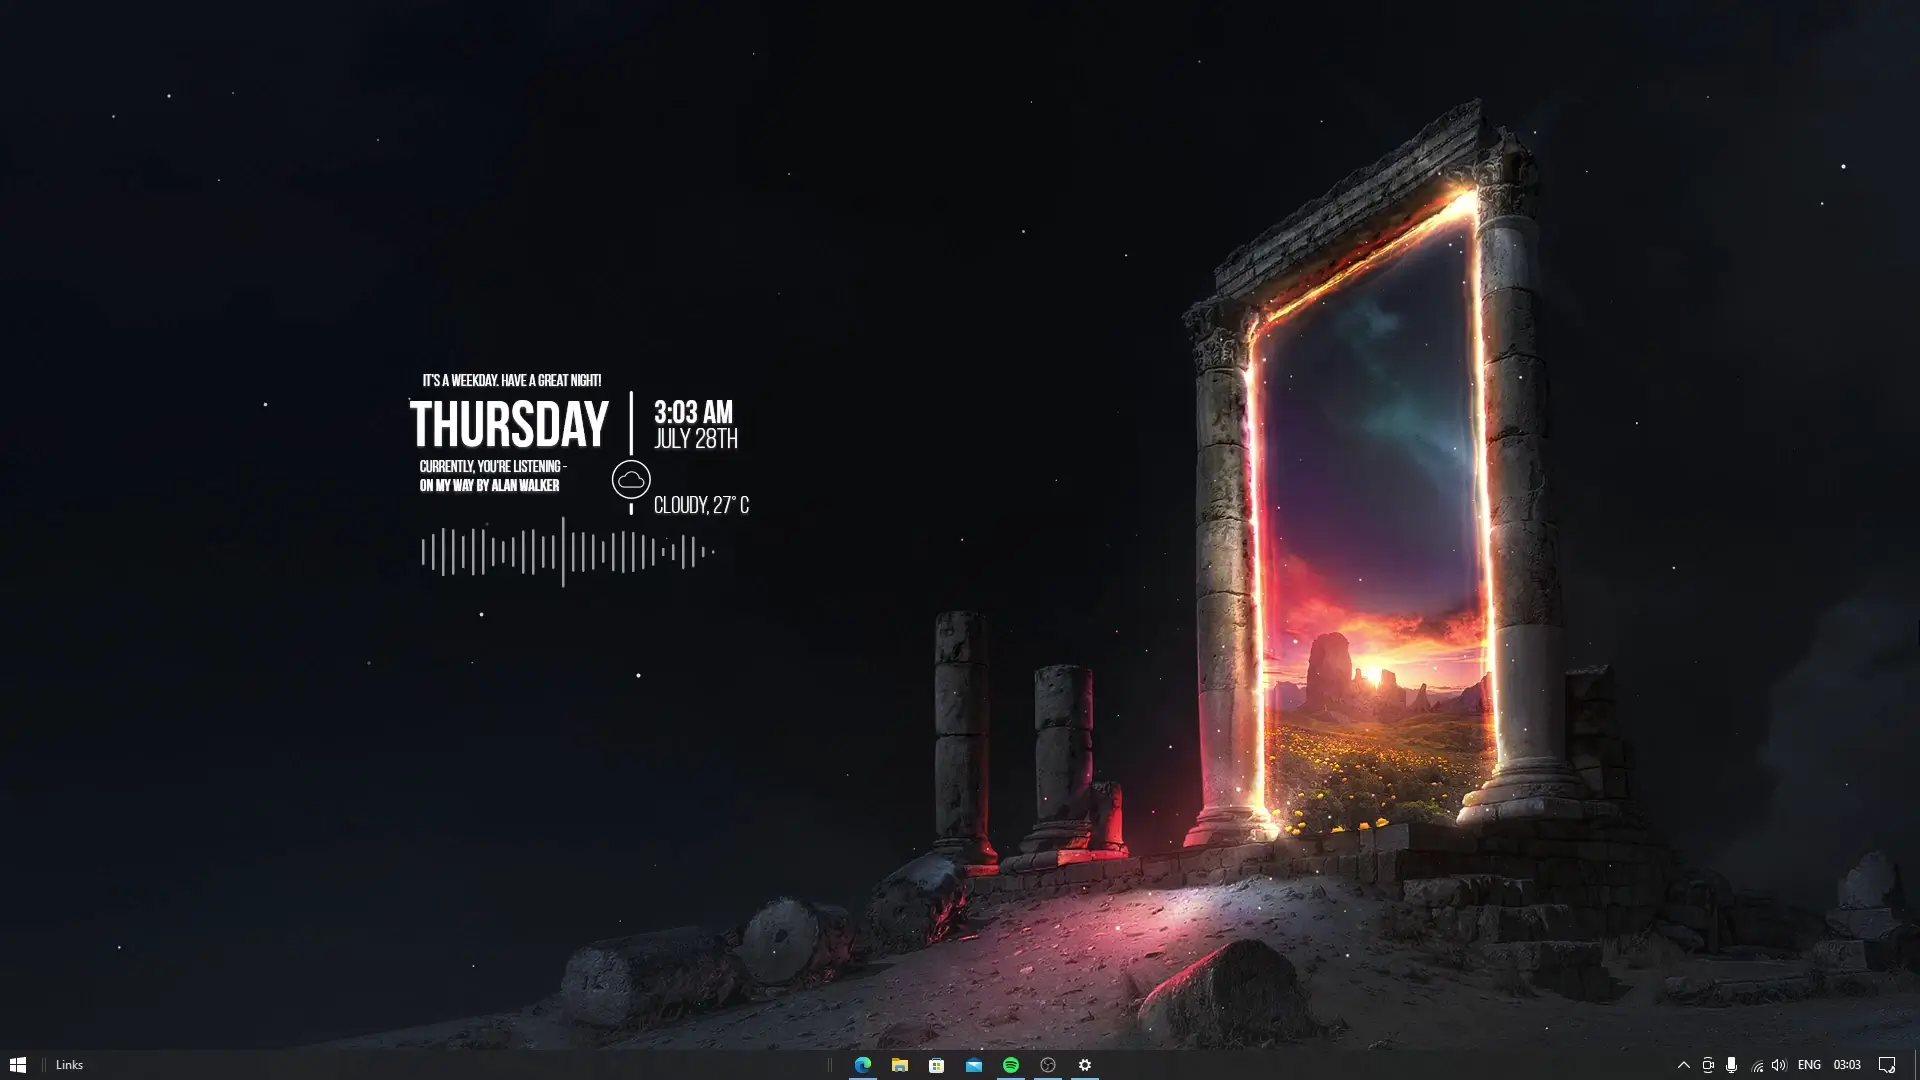
Final Result
Once all widgets are loaded and positioned correctly, your desktop will display a clean layout with a minimal wallpaper and useful widgets.
This type of setup not only improves the appearance of your desktop but also makes it easier to view important information at a glance.
With Rainmeter, you can always modify the widgets later, change their position, or replace the wallpaper to create your own unique desktop style.