Many desktop customization videos use a mix of tools such as live wallpapers, widgets, and multiple visual effects. However, you do not always need several applications to make your desktop look good. In this tutorial, the setup focuses on a simple idea: using Rainmeter and one wallpaper to create a clean and stylish desktop layout. If you enjoy minimal desktop designs that still look modern and organized, this setup is easy to follow and works well on both laptops and desktop computers.
What This Setup Is About
In many customization setups, live wallpapers are used to create animated backgrounds. While they look impressive, some users prefer a simpler approach that does not use animated elements. This guide shows how to achieve a visually appealing desktop using only Rainmeter skins and a static wallpaper.
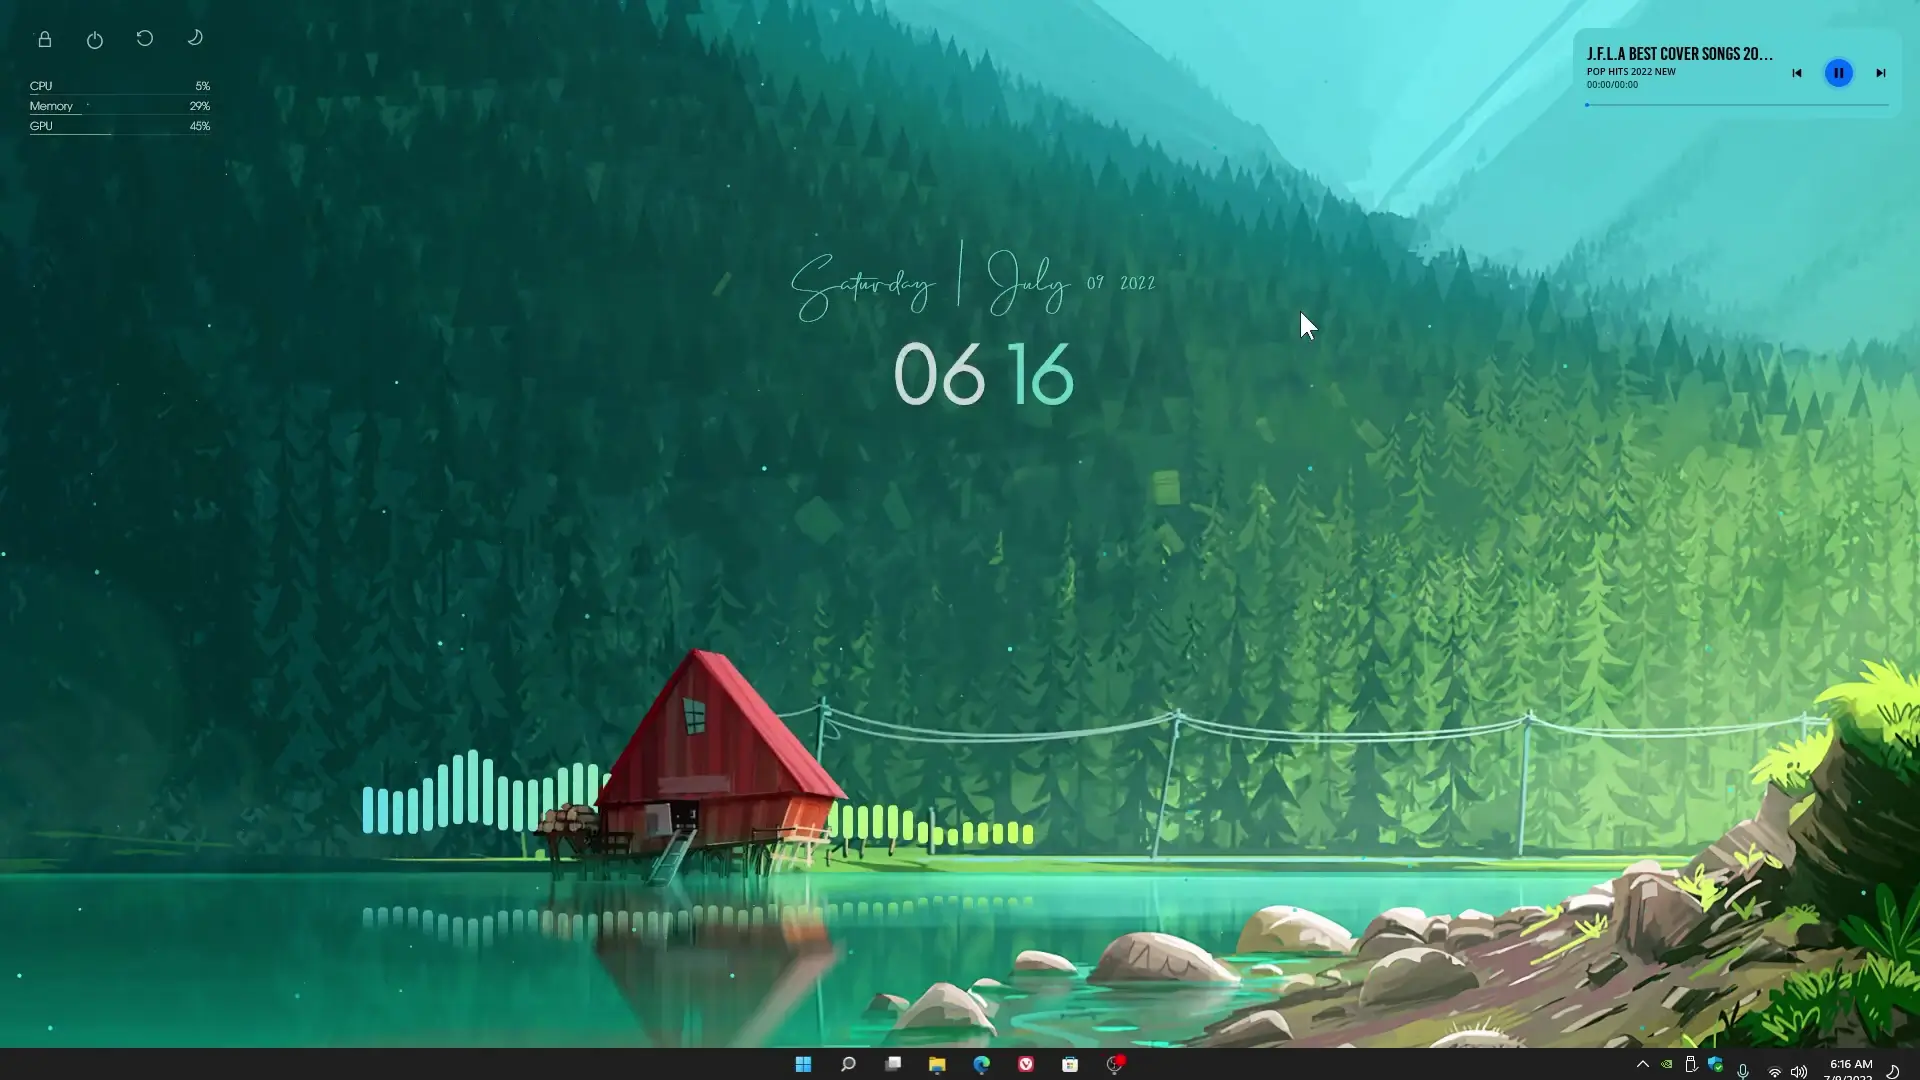
The result is a desktop that looks modern, organized, and easy to use without adding unnecessary system load. Rainmeter allows you to place useful widgets on the screen, such as clocks, system information panels, or minimal visual elements that match the wallpaper design.
What You Need Before Starting
Before following the tutorial, make sure you download and install the required files. These tools help create the same layout shown in the video.
Required items:
- Rainmeter
- Wallpaper used in the setup
- Sonder (Rainmeter widget/skin)
- Jax-Core components
Rainmeter is the main application used for desktop customization. It allows users to add small widgets called skins that display information or create visual design elements on the desktop.
Download Files & Wallpapers
Installing Rainmeter
The first step is installing Rainmeter on your Windows computer. Once installed, the software runs in the background and allows skins to appear on your desktop.
After installation:
- Launch Rainmeter.
- Open the Rainmeter skin manager.
- Install the skins included in the download files.
- Activate the skins you want to display on your desktop.
Rainmeter is lightweight and widely used for desktop customization, making it a popular option for users who want to personalize their workspace.
Applying the Wallpaper
The wallpaper plays an important role in this setup because the entire design is built around a single background image.
To apply the wallpaper:
- Download the wallpaper from the provided files.
- Right-click the image.
- Select Set as Desktop Background.
Choosing a clean wallpaper helps the widgets stand out while keeping the desktop visually balanced.
Setting Up the Sonder Widget
The Sonder widget is one of the main visual elements used in this setup. It works as a Rainmeter skin that adds a modern design element to the desktop.
After installing the skin:
- Open the Rainmeter manager.
- Locate the Sonder skin.
- Load the widget onto your desktop.
- Adjust its position to match the layout shown in the tutorial.
You can move and resize widgets to fit your screen resolution or personal preference.
Using Jax-Core Components
Jax-Core is another component that helps organize and manage certain Rainmeter skins. It improves compatibility and provides extra customization options.
Once installed, Jax-Core allows you to easily manage supported skins and adjust their settings without complicated steps.
Final Desktop Result
After completing all the steps, your desktop will have a clean and minimal appearance. Instead of relying on animated wallpapers or heavy visual effects, this setup uses a simple wallpaper and carefully placed Rainmeter widgets.
The result is a desktop that looks modern while still staying lightweight and easy to maintain.